Growing Chestnut mushrooms is a great project for those interested in unique culinary mushrooms. Chestnut mushrooms are a versatile culinary mushroom that are as easy to cook as they are to grow. In this article, we’ll provide a simple guide for how to grow Chestnut mushrooms using your Chestnut Mushroom liquid culture and supplies you already have around the house! Plus, we find Chestnut mushroom cultivation so interesting because of its similar needs and growing environments to Psilocybe cyanescens and other wood-loving psilocybe species.
What Are Chestnut Mushrooms?
Pholiota Adiposa, commonly known as Chestnut Mushrooms, are one of the most typical and easy-to-cultivate gourmet mushrooms. In the wild, Chestnut mushrooms can be found growing at the base of hardwood trees throughout the Northern Hemisphere, where their spores naturally spread and thrive in decaying wood and leaf litter.
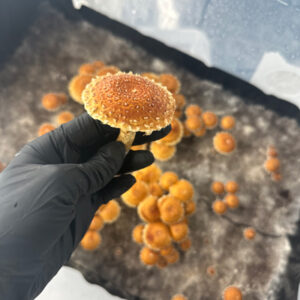
Commonly mistaken for your typical button mushroom, chestnut mushrooms have a pretty recognizable shape and size. What really sets them apart from button mushrooms is their brown ‘chestnut’ color and fluffy white specks as well as their firmer texture. You can fry them, eat them in soups, or even eat them raw, and they’ve been used in Japanese and British cuisines throughout history.
Growing Chestnut Mushrooms
While white button mushrooms are easily found at the grocery store, chestnut mushrooms are less readily available, and people tend to forage or grow them themselves. That’s why knowing how to grow chestnut mushrooms will be particularly useful if you’re interested in trying them. As one of the lesser known gourmet mushrooms, there’s also not much info online about how to grow them compared to other more popular species like Pink Oysters.

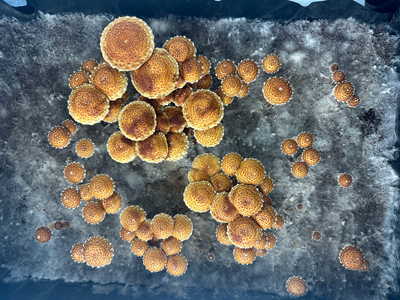
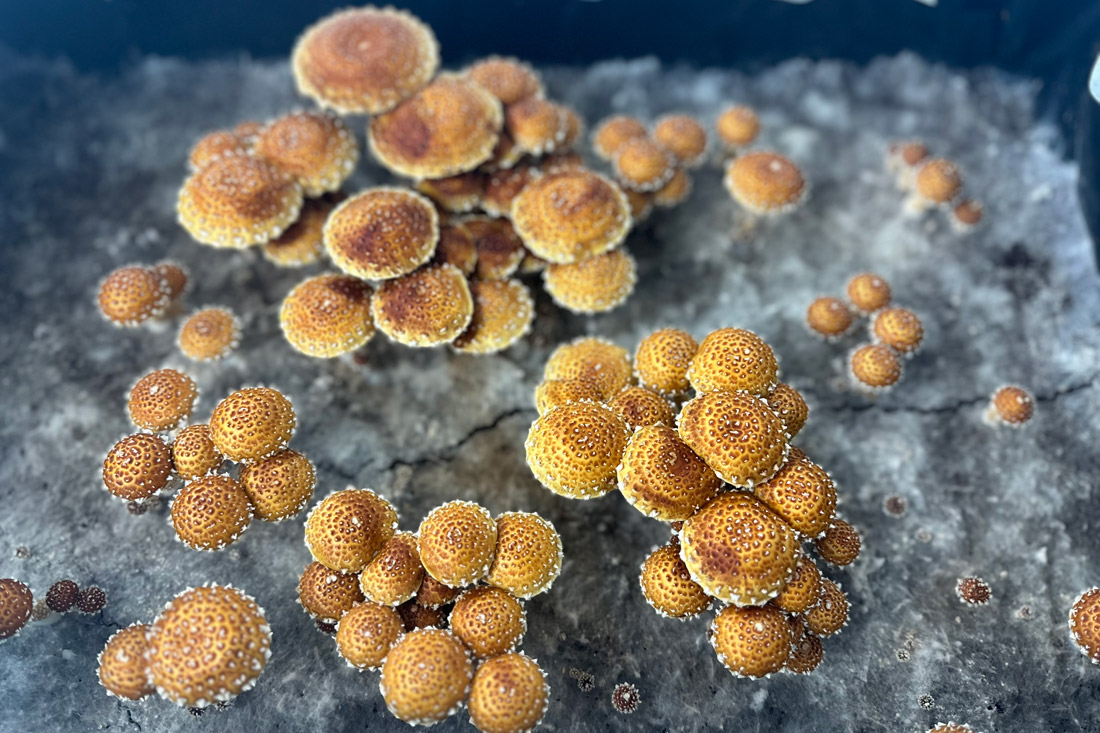
Chestnut mushrooms grown by the ITW team
There’s a lot of trial and error around this strain and there are more techniques and ingredients that can work than what we’ll outline in this guide. There are numerous ways to adapt these instructions to fit your needs and interests, from growing chestnut mushrooms on logs outdoors to even growing chestnut mushrooms in buckets and monotubs.
How to Grow Chestnut Mushrooms Indoors in 7 Steps
While people used to forage these wild mushrooms in their natural habitat, there are several methods to grow chestnut mushrooms indoors. All of these methods start with the same basic steps. While there are all-in-one kits on the market, the basic steps to growing chestnut mushrooms includes making grain spawn, then adding that inoculated spawn to a substrate, and finally fruiting the mushrooms—with plenty of patience in between each step. Some people get worried by the slow progress with chestnuts, so don’t get discouraged if growth takes time!
Step 1: Gather Your Mycology Supplies
Sanitary equipment:
- Disposable latex gloves
- Isopropyl alcohol
- Paper towels
- Laminar flow hood or still air box setup (optional)
Spawn equipment
- 1 Pholiota adiposa “The Chestnut Mushroom” Liquid Culture Syringe
- Grain spawn (rye grain, millet, or wheat)
- Large pot
- Colander
- Scale (optional)
- Pressure cooker or canner
- Clear 18-gallon plastic storage tote with lid (or something comparable)
- Spawn containers (choose from the options below)
Option A: 3 lb grow bags
- Self-healing injection ports (if your bags don’t already have them)
- Impulse sealer (optional if you are using this method)
Option B: 1 qt jars
- Regular jar lids + an awl (or similar sharp object) to poke holes in your lids
- Adhesive self healing injection ports + micropore tape OR: Specialized injection port lids for mushroom growing
Fruiting equipment:
- Master’s mix ingredients::
- Soybean hulls
- Hardwood fuel pellets
- Water
- Gypsum (optional)
- Vermiculite (optional)
- More bags or jars of your choice
- Spray bottle
- Scissors or knife
- Scale (optional)
Then, you’ll want to find a space that’s clean and has as little air flow as possible. A clean environment with less air flow will provide fewer opportunities for bacteria to get in and contaminate your grow. For each step, you’ll want to wear gloves and spray both your equipment and surfaces with isopropyl alcohol to prevent contamination.
Step 2: Make Chestnut Mushroom Spawn
With all your mycology supplies set up, you can now prepare the grain spawn. Grain spawn simply provides a nutritious jumping off point for your mycelium. The process of making grain spawn involves softening your grain to make the nutrients more accessible to the mycelium, letting it dry, and then sterilizing it in a container of your choice.
For this step you’ll need:
- Grain spawn (rye grain, millet, or wheat)
- Large pot
- Colander
- Clean towel
- Measuring cups OR a digital scale
- Grain bags with .2 micron filter patch OR mason jars
- If using mason jars, you will need: regular jar lids + an awl (or similar sharp object) to poke holes in your lids + adhesive self healing injection ports + micropore tape (or other water resistant micropore adhesive) OR specialized injection port lids for mushroom growing
Start by measuring out your grain into your large pot. For 3 lb grain bags, you’ll want to use about 1 kg of grain per bag. If you’re using quart sized mason jars, measure out 1.5 cups of grain for each jar. Start by rinsing the grain, then fill the pot with a generous amount of water and soak overnight.
Drain the water and fill it again. Then bring it to a boil, letting it simmer for 10-15 minutes. The goal here is to make the nutrients more available for your mycelium, so you’ll want to cook your grains until they are soft, but haven’t burst.
Next, pour the grain into a colander and remove the water. Once most of the water is gone, spread the grain out onto a towel to dry for a couple hours or even overnight. We don’t want any excess water in this mixture.
Fill and Seal Your Containers
Once your grain spawn has dried, you can add it to your grain bags/mason jars. You should aim to evenly distribute your grain between all the containers you’re using. If you want to get precise and use a scale, you’ll want to measure out 1300 grams for each 3 lb bag, or 450 grams for each quart jar.
Bags:
Once your containers are filled, you want to seal them. If you’re using bags, fold them closed and then seal them with an impulse sealer if you have one, making sure the filter patch is still accessible.
Mason Jars:
To start, make sure that all parts of the jar, including the lid, are clean and dry. This next step will depend on what kind of lids you’re working with. If you opted to use specialized jar lids for mushroom growing, your lids are good to go! If you have regular lids, you can easily punch holes to serve the same purpose as those specialized lids. Use an awl or similar pointy object (sprayed with isopropyl alcohol) to poke two holes into the top of the jar lid—one on each side of the circle.
Once your lids are prepared, fill each of your jars with your prepared grain, then close the lids on top. If you’re using premade injection port lids, you are all set to move on to the next step! If you used the DIY method, you’ll now cover the holes you poked in your lids. On one of the holes, you’ll place an adhesive self healing injection port, and on the other, you’ll place some micropore tape.
All of these steps may seem like a lot, but the goal here is to provide a sterile and sealed environment with a bit of air exchange for the mycelium. These ports will allow us to inject our liquid culture later while keeping everything sealed.
Sterilize the Cooked Grain
Next, you’ll sterilize the grain. There are several options for this depending on whether you’re using a pressure cooker or a canner.
For either device, it’s important to use a rack or some other device to make sure that the bottoms of your bags or jars aren’t touching the water. If you don’t have a rack, there are tons of hacks for this online including using mason jar lids to create a buffer between your containers and the bottom of the pot. You’ll also want to place something heavy and heat-resistant on top of your containers to keep them down.
You’ll need to sterilize jars for at least an hour and a half, and bags for two and a half hours, so be sure to fill your cooker with enough water to sterilize for the right amount of time. Then you can add your containers of grain and sterilize them at 15 psi.
Step 3: Inoculate Grain Spawn with Chestnut Mushroom Liquid Culture
Once the sterilization process is complete, the containers will need to cool down before you can inoculate them. It’s best to let them rest several hours, ideally overnight, to make sure everything is completely cool.
For this step you’ll need:
- Sterilized grain spawn containers (detailed above)
- 1 Pholiota adiposa “The Chestnut Mushroom” Liquid Culture Syringe
- Adhesive injection ports (for bags)
- Plastic tub
Prepare For Inoculation
Before inoculation, you’ll want to sanitize your area by spraying your work surface with alcohol and wearing gloves. You should also spray your gloved hands with alcohol in between each step as you handle different items. It’s also important that your space has minimal airflow to prevent contamination. Many advanced growers use a flow hood, like our 3×2 ITW flow hood, to reduce the chances of contamination, but for home growers, just aim for a space without drafts, fans, or vents blowing air around. You could even make your own DIY still air box to help further with this. Once your work space is sterilized and you’ve put on gloves, you’re ready to inject your liquid culture.
 If you’re using bags, you’ll need to add an adhesive injection port if your bag doesn’t have one already. To do this, spray that area with some rubbing alcohol and wipe it down with a paper towel, then stick the injection port on your bag. For jars, you are going to use the injection port already on the jar lids.
Inoculate Your Containers
Now you can inject your bags or jars with your Chestnut mushroom liquid culture. Twist off the cap from your syringe and replace it with the sterile needle included with your syringe. Poke the needle through the injection port, and push down on the syringe to inject the liquid culture (LC). Spore syringes are another method commonly used in mushroom cultivation, though liquid culture is often faster and more reliable for Chestnut mushrooms. There’s no need to worry about too much precision here, but less is more with liquid culture, and too much LC can lead to too much overall moisture in your container. Our syringes contain 10-12 cc of liquid culture. For grow bags, you should use 4 cc per grow bag (so less than half of your syringe). For quart mason jars, you’ll want to use around 2 cc’s, which should be ⅕ or even less of your syringe.
Once you’ve inoculated your grain, it’s time to let the mycelium do its thing! Spray down your plastic tub with isopropyl alcohol and let it dry completely before putting your bags inside. Then you can close the tub and set it in a dark warm place like your closet, around 75-80 degrees F for two weeks. During this time, you’re allowing chestnut mushroom mycelium to spread throughout all the grain in your containers.
About a week in, you can shake the bag to disperse the mycelium and speed up colonization.
Step 4: Create Chestnut Mushroom Substrate
After about two weeks, or when the mycelium has spread through your entire bag, it’s time to make substrate so you can begin the next step of growing your chestnut mushrooms.
What Is Substrate?
Substrate is a nutritious mixture that will allow your mushrooms to fruit, basically allowing the mycelium to sprout actual mushrooms. Although our grain spawn was a great material for spreading mycelium, mushrooms can’t form without the nutrients and moisture from substrate.
Masters Mix is a simple substrate recipe that works well for a variety of mushrooms, so that’s what we’ll use here. It’s a simple ratio of:
- 1 part hardwood fuel pellets
- 1 part soybean hulls
- 3 parts water
- Gypsum (optional)
- Vermiculate (optional)
If you were following along with the grain ratios from previous steps, you could use about 450g of hardwood fuel pellets and soybean hulls, and about six cups of water.
Remember, it’s possible to deviate from this recipe—some people add other ingredients to optimize their substrate. For example, you might want to add a small amount of gypsum powder to the mix. Gypsum, also known as calcium sulfate, is very helpful because it is pH neutral. Gypsum helps maintain the pH of your substrate, ensuring that the mycelium has an optimal environment to grow in. This can help prevent contamination and increase the availability of nutrients in the substrate. Around one to two tablespoons of gypsum per quart jar or 4 tablespoons per five lb bag will help provide all these benefits.
You may also want to add vermiculite, a rough and porous type of rock that helps with water retention because adding it can help you get multiple flushes. People add up to one part by weight of vermiculite to their substrate, so around 450 g if you’re following our ratio.
Then you’ll hydrate this mixture, with either distilled water, or cooled water that you’ve boiled yourself. You can mix all this up in a large bowl or bucket before evenly adding the mixture to 5 lb mushroom grow bags or larger jars.
Sterilize Your Substrate
Next, you’ll fold the bags/seal your jars and follow a very similar process to the spawn in the pressure cooker. This time, you’ll pressure cook the containers for at least 2 hours at 15 psi, then let them cool completely (ideally overnight).
Step 5: Inoculate Substrate with Colonized Grain Spawn
For this next step, it’s very important that the environment is sterile to prevent any contamination. Again, you’ll want to spray everything down with isopropyl alcohol and wear gloves before working, and use an environment with little to no air flow or even use a still air box!
Open up your containers of colonized grain spawn and shake the mycelium around or even hit it gently to break it apart. Then, open your sterilized substrate containers, shake or stir it to free any settled material, and add an even amount of grain spawn to each substrate container. Shake and mix everything around to make sure the spawn is well dispersed.
Then it’s time to close everything back up—screw the jar lids back on, or use an impulse sealer to seal your bags.
You’ll incubate your containers in their tub at 75-80 degrees for two weeks or until you can see the mycelium has made its way through the entire bag. Once you can see the white mycelium has dominated the entire bag, it’s fully colonized and you can start fruiting.
Step 6: Chestnut Mushroom Fruiting Conditions
Once the substrate is fully colonized with mycelium, it’s time to begin fruiting. Fruiting is triggered by several factors including changes in temperature and humidity, which we’ll outline below, but we also need to create an exposed area for the mushrooms to grow out of.

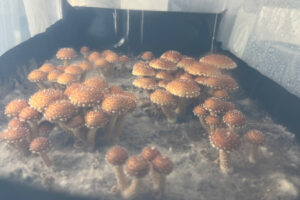
Chestnut mushrooms grown in a monotub by the ITW team
For jars, it’s as simple as opening the jar lid, and mushrooms will grow out of the opening. For bags, you’ll use clean scissors or something else sharp to slice into the fruiting block. The best method is to cut a couple slits at the top of the bag.
Chestnut mushrooms grow in cooler climates, so they need lower temperatures to fruit than many other mushroom varieties. You can place your colonized substrate back into their tub, and place the tub in an area with indirect light between 55 and 65°F. Chestnut mushrooms can be a bit finicky in terms of moisture, requiring about 70-85% humidity. While you don’t want things to get too moist, the mushrooms can sometimes abort—which is a term for when a mushroom starts to form, but then stops growing due to less than optimal environmental factors—if humidity is too low.
Step 7: When to Harvest Chestnut Mushrooms
Fruiting chestnut mushrooms can take a lot longer than many other gourmet mushrooms—at least 30 days—so don’t be discouraged if you don’t see much progress at first! Throughout the process, be sure to look out for small clusters of mushroom pins blocked by plastic and cut them free. Groups of pins will eventually grow into large clusters with little white flecks. You’ll know they’re ready to harvest when the cap breaks free from the stem and fully expands.
Chestnut mushrooms are easy to harvest: simply twist them at the base of the stem and pull. You can store them a couple days in the fridge, but it’s best to eat them as soon as possible. You can use them (stem and all) in your stir frys, stews, pasta dishes, and so much more.
Let us know how this worked for you, and please comment below if you’ve had success growing chestnut mushrooms differently!
Interested in growing other culinary mushrooms? Then check out our wide variety of gourmet mushroom liquid cultures!

